TECH ZONE
11 Steps To Podcasting GOOD on the CHEAP

In searching the net for good advise on how to make a decent podcast, I found some good, and some not so good tips. Really, you can go from spending nothing to having a full blown broadcast studio in your house.
But lets dispense with the hypotheticals and just assume that you want to make a podcast that sounds good without cashing in your retirement savings. Well I’m going to show you how for UNDER $100. Although I have not been doing this for long, I think you’ll save a lot of time, money, and frustration by not making some unnecessary mistakes that I did.
First off, none of my advise has anything to do with your content. If you have nothing to say and a voice that sounds like you’ve swallowing gravel mixed with lye, nothing here is going to make you sound like a soothing Barry White. Be sure to have a point, and have fun. Do your own thing, and treat it like a hobby. The reason I started was to try and cure my Ben Stein speaking style for whenever I spoke in church, but I soon found myself just having a ball with being an imaginary radio host!
So where to start?
1- First off, you need a hosting site. Initially I used PODBEAN until I got my own hosting account, but there are a multitude of options. Doing a search will find something that speaks to your kind of person. Almost all of them have good abilities to upload your podcast to iTunes, which is definitely where you want to be. As with most things in life, you get what you pay for. Podbean has a free service, but I upgraded to a paid package for some additional space and site customization benefits. It all depends what you’re shooting for!
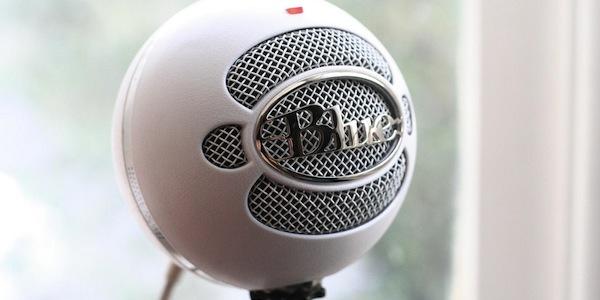
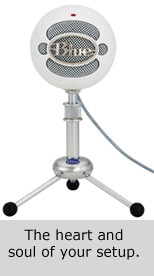
 2- Start recording. WAIT, don’t you need a microphone? Well, you can use your computer mic…if you want to sound like absolute, unmitigated CRAP. This is where you will spend your money. Again, it can go from cheap to thousands, but lets be realistic. You’re someone making a podcast in your home. Period. Get a USB cardioid microphone. Don’t get a dynamic mic as although it is cheaper, it won’t cover the range of your vocals as nice. I went with the Blue Snowflake because it was a good cross between quality and cost. In hindsight, I probably should have spent a little more and got the Blue Snowball, but was afraid my wife would ask “what the hell is THAT and what did you spend??” Both are very highly rated and run in the $100 or less range.
3- Make a pop filter out of pantyhose. A pop filter stops the explosive “P” sounds. Cardioid mics are very sensitive to this problem. Sure you can buy one for $30…or you can make one for next to nothing. Your call, and your money. Check this site out for a how-to.
 4- Check room acoustics. A cluttered room is exactly what you want. I even have corrugated packing foam behind my microphone to trap echo as an added bonus. In comparison, Episode 7 was done in an office room and you can tell the echo is a little strong compared to Episode 8. You can get acoustic foam, but you can get the same effect by using a carpeted room and throwing laundry all over the place. Hey…art isn’t supposed to be clean!
5- Recording software. If you have a Mac, you use Garageband, end of story. Garageband even has many built in effects to assist with your voice and clean up the audio. Many push Audacity, but I can’t understand why if you have the alternative. Oh, using Windows? Then you’ll love Audacity. Honest. Plus it’s FREE!
6- Postproduction. You can do this the easy way, or you can do this the hard way. Before you start adding music, sounds or whatever, you must first clean the audio. Garageband has built in filters ( I generally use the Podcast Male Radio setting and tweak it from there ) or Audacity has a remove noise option. Once done, export the voice audio to AIFF format to your desktop. At that point, I’ll introduce you to your favorite tool…

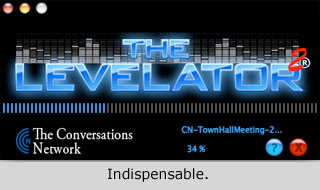
Now you do it the easy way. Run it through a piece of software called Levelator. My first podcasts were an audio abomination. This will level out your highs and lows to give you an even sounding professional voice recording instead of people having to crank up their volumes to hear your voice, and then getting their eardrums assaulted when a normal song is played after. I made this wonderful discovery around Episode 5. I then scrambled to redo the audio of previous shows as they sounded horrid in comparison. Of course Levelator won’t be as good as your local radio station with a team of audio specialists, but it will kick the living heck out of what you had before! AND IT’S FREE!! FREE!!! Please, if you use it make a donation because this software is invaluable to the podcasting community!
7- Take your leveled audio, and add music, effects, etc in Audacity or Garageband. A little tip…don’t run music through Levelator, as music is not intended to have an even flow like voice. For example, Episode 2 was simply rerun through it with audio and effects combined and you can tell how the theme song at the beginning goes up and down in an unnatural way. Hey, speaking of effects…want FREE sound effects? Go to www.soundboard.com and take your pick of thousands.
8- Once assembled, export to m4a or mp3. Initially I did m4a, but discovered that there was no real incentive to exclude owners of other non-iPod music players. MP3 is a good all-around choice you can’t go wrong with. M4A is only needed if you want to add a video track.
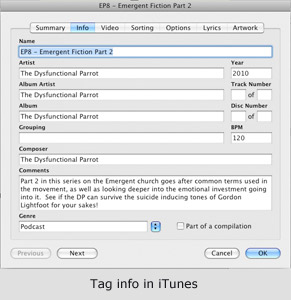
9- Add ID3 Tags. Huh? Simply put, this is where you can add little bits of information such as podcast icon, and episode information. iTunes accomplishes this with ease. That way your show doesn’t have a blank icon on people’s iPod’s. Hey, image is everything!

10- Upload to your host site.
11- Go to iTunes and register your podcast.
That’s a pretty diluted step-by-step, but it will give you more knowledge than I had when I jumped in. As with any blog, a podcast may take a while before you find your niche. Relax, and have fun with it!


Mikey B
February 17, 2014 at
this was awesome and helpful
Lim
October 13, 2013 at
Thanks! great idea !